Office 365 Security & Compliance

Office 365 Security & Compliance

This page will list security settings and configurations that is advisable to implement in your environment.
Each environment is different where I believe the below settings are easy to setup and provides a way to get to a more mature security level.

  1. Create and enable a DLP policy
  2. Enable Office 365 Cloud App Security
  3. Enable Office 365 audit log search

Create and enable a DLP policy

Data Leak/Loss prevention policies helps the organization and user to prevent or inform them when specific data like driver’s license number, passport numbers or credit card numbers are being shared. It is advisable to have at least one policy enabled where you can verify if it only monitors behavior or if actions should occur like blocking the mail or informing the user.

There are a lot of default policies where in my case the GDPR is most relevant to inform or prevent users to send privacy related information.

How will this impact my users?

It depends on the configuration but for example mail cannot be sent anymore due to the amount of data or users receive an e-mail saying they just sent an e-mail containing a lot of specific data.


Using the interface

This policy can be created at the security and compliance admin center. The direct link is https://protection.office.com/datalossprevention
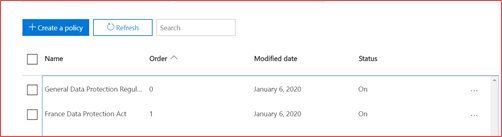
Create a policy

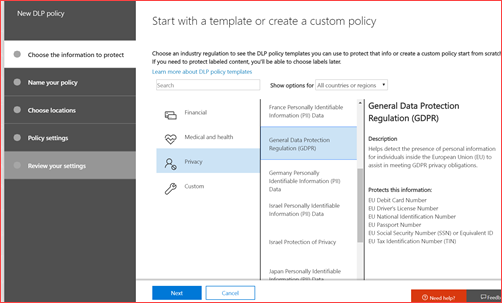
Select your policy and click on Next

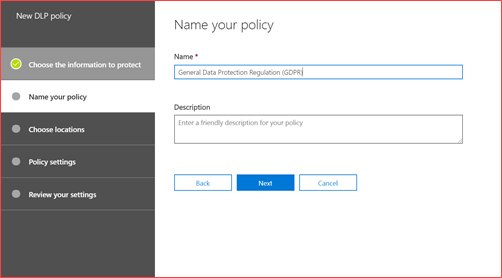
Name your policy and click on Next

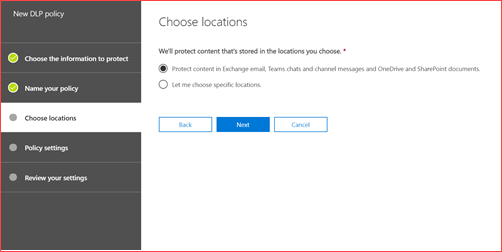
Choose the locations and click on Next

Change the advanced settings or use the default settings. In my case I would have added the BSN (social security number of Dutch citizens) to the list.

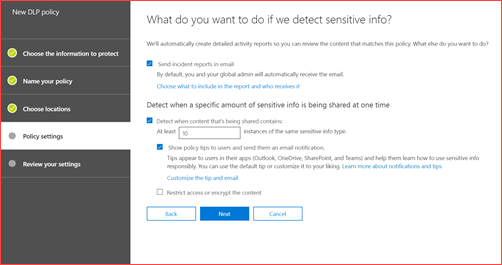
Change the settings or leave at default. Click on Next

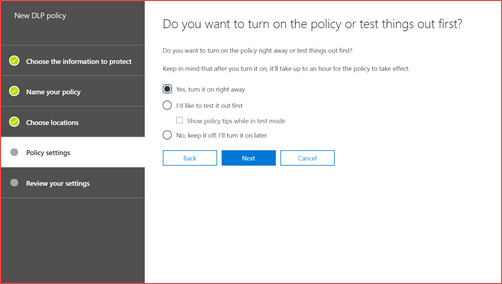
Test it or enable it directly and lastly create the policy

Using PowerShell

It is possible to create a DLP policy using PowerShell where you will be needing the new Security and Compliance admin module.

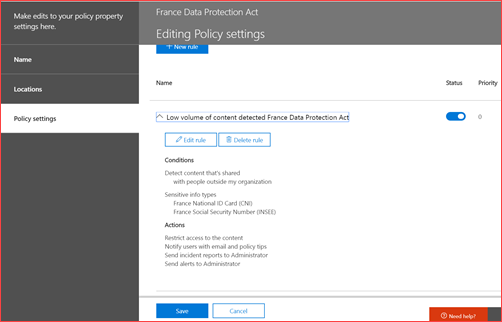
I will be creating the France Data Protection Act using PowerShell

Connect-IPPSSession
new-dlpcompliancepolicy -name “France Data Protection Act” -ExchangeLocation “All” -OneDriveLocation “All” -SharePointLocation “All” -Mode “Enable”
$info = @(@{Name =”France National ID Card (CNI)”; minCount = “1”},@{Name =”France Social Security Number (INSEE)”;minCount=”1”})
$rule = @{
‘Name’ = ‘Low volume of content detected France Data Protection Act’;
‘Comment’ = “Comment”;
‘Policy’ = ‘France Data Protection Act’;
‘ContentContainsSensitiveInformation’=$info;
‘BlockAccess’ = $true;
‘AccessScope’=’NotInOrganization’;
‘BlockAccessScope’=’All’;
‘Disabled’=$false;
‘GenerateAlert’=’SiteAdmin’;
‘GenerateIncidentReport’=’SiteAdmin’;
‘IncidentReportContent’=’All’;
‘NotifyAllowOverride’=’FalsePositive,WithJustification’;
‘NotifyUser’=’SiteAdmin’
}
New-dlpcompliancerule @rule

Enable Office 365 Cloud App Security

Office 365 Cloud App Security can be used to verify your Azure Active Directory OAuth applications. It will also list suspicious activities in your Office 365 environment like an activity from an infrequent country. You can also prevent users from for example downloading SharePoint documents.

How will this impact my users?

Users may be impacted if you add application restrictions, but the analysis side of Cloud App Security doesn’t impact the user.

Using the user interface

Office 365 Cloud App Security can be enabled at https://protection.office.com/advancedsecuritymanagement

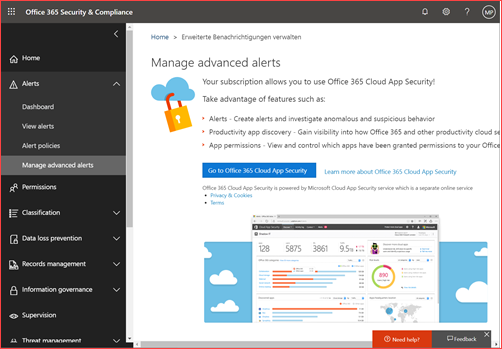
In this case it has been enabled but it will look like below if you still need to enable it

Using PowerShell

It is currently not possible to enable this with PowerShell

Enable Office 365 audit log search

The audit log is by default not enabled where you should enable this directly. The audit log captures user activity from almost all aspects of Office 365 like SharePoint, Exchange and Teams. It will also capture admin activity like changing user roles. The audit log can be used for investigation activities.

How will this impact my users?

This will not impact the users, but you can communicate to your end users the type of information you capture.


Using the user interface

Auditing can be enabled at https://protection.office.com/unifiedauditlog

Auditing is disabled when you see the yellow bar. Click on turn on auditing

Using PowerShell

It is possible to set this setting using PowerShell where you will be needing the new Exchange Online module.

Connect-EXOPSSession
Set-AdminAuditLogConfig -UnifiedAuditLogIngestionEnabled $true

Skills

Posted on

December 10, 2019

Submit a Comment

Your email address will not be published. Required fields are marked *

This site uses Akismet to reduce spam. Learn how your comment data is processed.