
Using conditional access
You can use conditional access to block access when basic authentication is used or allow access for basic authentication applications. Click here for the direct link.
Create a new policy and select a group which has all or some of the users. Preferably a dynamic group. And then select for which application this policy applies. In my case I select Exchange Online.
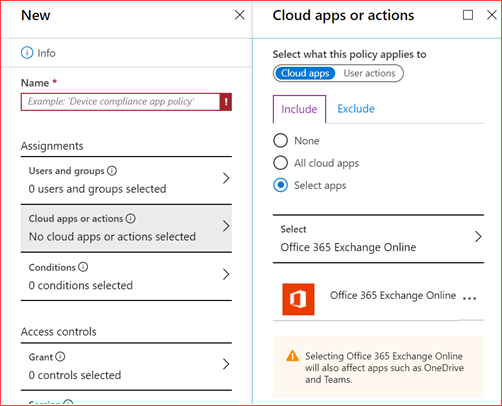
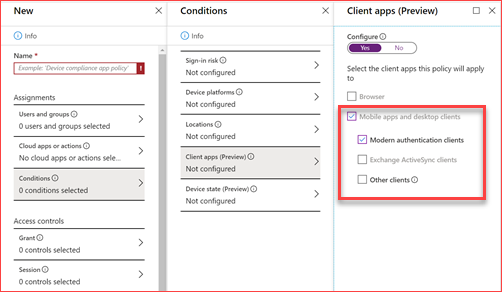
Then under conditionals you can select the authentication client this application can or cannot use. Under Access controls you can block or allow this policy.
Using the user interface
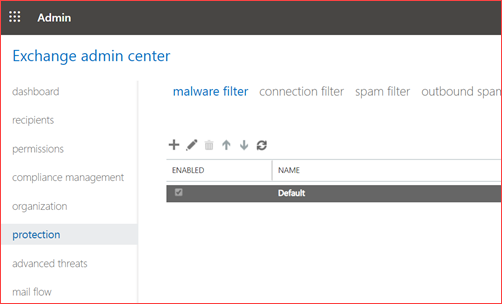
You can configure these settings in the Exchange admin portal by going to https://outlook.office365.com/ecp and then Protection -> malware filter
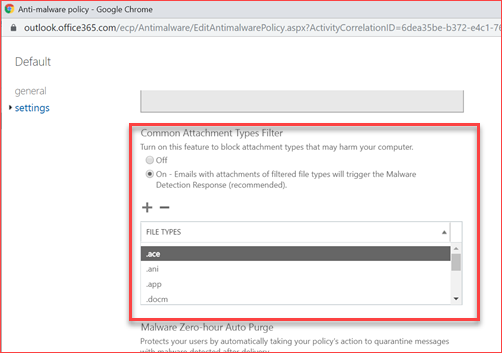
 Edit the default filter and enable the common attachment filter
How will this impact my users?
Users will no longer be able to download documents from everywhere as it will require a compliant device. When using Intune you can setup your own rules to be sure that content is being secured and managed.
Users have the following experience without the policy when downloading through Outlook Web Access.

Users have the following experience with the policy when downloading through Outlook Web Access.
Using PowerShell
You will need to use PowerShell to change the default Outlook Web App policy. You will also need to install the Exchange Online module to be able to use the below CMDlets. Run the below CMDlets to enable the common attachment types filter for your Exchange Online environment. You need to specify the correct identity should you have create a custom policy. Note that this alone isn’t enough as you will also need to create a conditional access policy.
Connect-EXOPSSession
Set-OwaMailboxPolicy -Identity OwaMailboxPolicy-Default -ConditionalAccessPolicy ReadOnly

Using conditional access
You can customize the SharePoint Online policy should this have been created already or create a new one where you can exclude certain service accounts or want to allow this policy on company devices which are located on-premises. Click here for the direct link.
Make sure you add Exchange Online to this policy
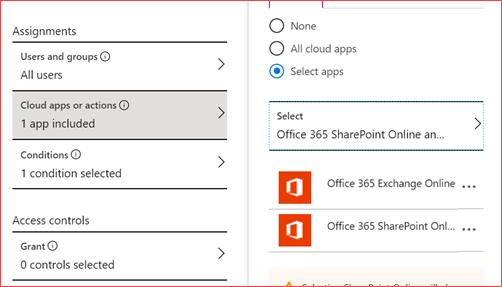
and select that this policy applies to the browser.
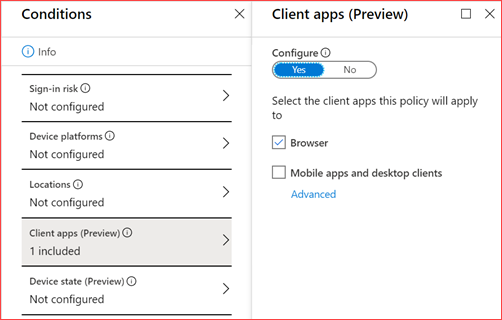
and lastly use app enforced restrictions

How will this impact my users?
Mails containing spam, phishing or malware will be automatically removed from users mailboxes. This doesn’t prevent users from clicking on it should the mail still be in the mailbox. It will help for users that didn’t read or acted on the mail yet.
Users will see the following without the policy enabled
and the following with the policy

Using the user interface
You can configure these settings in the Exchange admin portal by going to https://outlook.office365.com/ecp and then Protection -> malware filter
Ensure the Malware Zero-hour Auto Purge is On and we suggest you add a mail address for notications.

Using the user interface
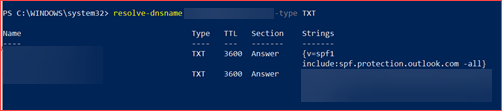
You will need to add this record to each domains DNS list. The DNS list can be altered at your domain providers website. Add a TXT-record with the value “v=spf1 include:spf.protection.outlook.com -all”

Using PowerShell
You can add DNS records programmatically for some providers but most likely it will have to be added manually. The below commands can be used to verify if the record exists.
resolve-dnsname <Domain> -type TXT
Using the user interface
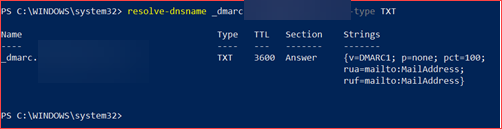
You will need to add this record to each domains DNS list. The DNS list can be altered at your domain providers website. Add a TXT-record with the value “_dmarc” which should translate to _dmarc.<Domain>.<Extension> and add as content “v=DMARC1; p=none; pct=100; rua=mailto:<MailAddress>; ruf=mailto:<MailAddress>; fo=1
![]()
Using PowerShell
You can add DNS records programmatically for some providers but most likely it will have to be added manually. The below commands can be used to verify if the record exists.
resolve-dnsname _dmarc.<Domain>.<Extenstion> -type TXT
Using the user interface
There are two things you need to do to enable DKIM.
- DNS Records
You will need to add the below records to each domains DNS list. The DNS list can be altered at your domain providers website. Add the below CNAME records
Host name: selector1._domainkey
Points to address or value: selector1-<DomainName>-<Extension>._domainkey.<TenantName>.onmicrosoft.com
TTL: 3600
Host name: selector2._domainkey
Points to address or value: selector2-<DomainName>-<Extension>._domainkey.<TenantName>.onmicrosoft.com
TTL: 3600

- Exchange Admin Portal
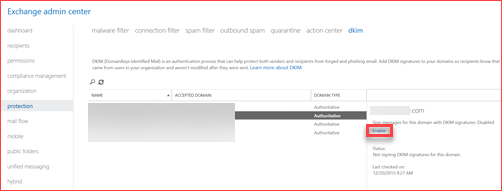
Go to protection -> Dkim and click on Enable after you updated the DNS records.
Using the user interface
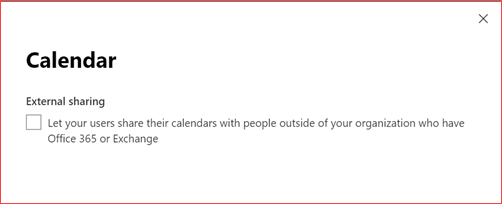
You can change this setting using the default admin portal of Office 365 at https://admin.microsoft.com. Navigate to Settings -> Settings -> Calendar
 Make sure you deselect the checkbox to disable sharing with external users
Using PowerShell
You can change this setting using PowerShell. The below Cmdlet can be used to change this setting. You will need the Exchange Online PowerShell module for this. You may need to change the name of the identity if you created a custom policy.
Connect-EXOPSSession
Set-SharingPolicy -Identity “Default Sharing Policy” -Enabled $False

Using the user interface
You can add this rule using the Exchange Admin portal at https://outlook.office.com/ecp/.
 Go to Mail Flow Rules
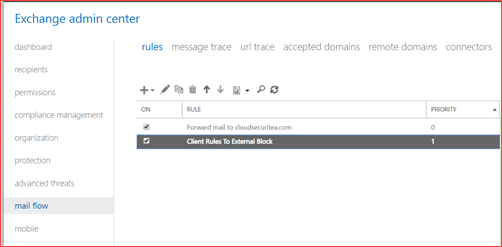 Create a new rule where I already added one
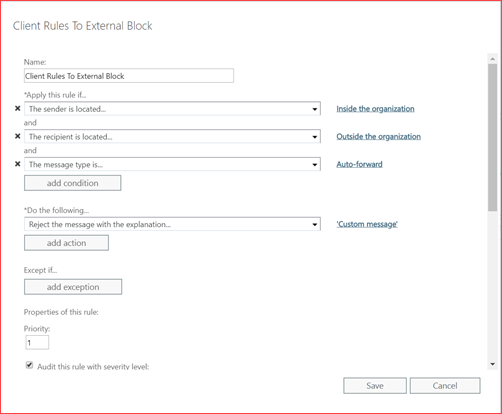 Configure the rule to block mails from inside the organization to outside the organization.
